MAILBOX REPAIR AND REPLACEMENT GUIDE
Time For A New Mailbox? We’ve Got You Covered!
Whether Winter to took a tole on your mailbox, leaving it leaning, damaged, or missing entirely or it’s time for an upgrade, we have everything you need to replace or repair it with ease! Our top-quality products will get your mailbox standing strong again.
STEP-BY-STEP MAILBOX INSTALLTION GUIDE
- Check Regulations
Before installation, consult your local post office or homeowners association for any specific guidelines regarding mailbox placement and design. - Purchase a Post and Mail Box
These items are in stock at your local Curtis Lumber:
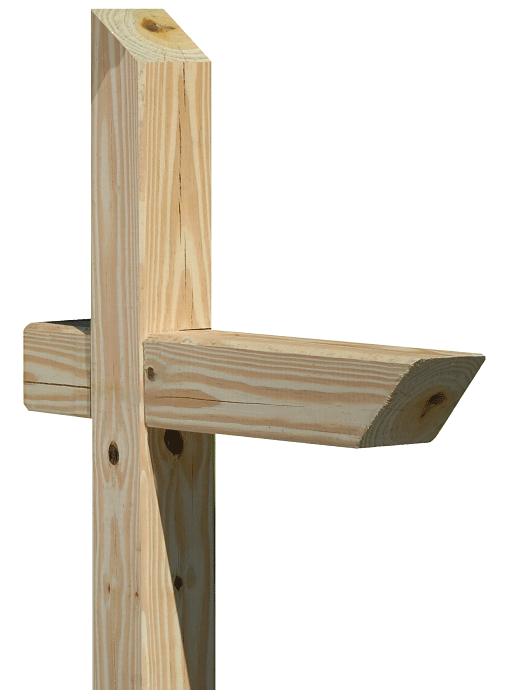
4”x 4” Standard Treated Mailbox Post
72” High. Southern yellow pine, Grade #2 and better. Pre-assembled for easy installation. (#0143321)
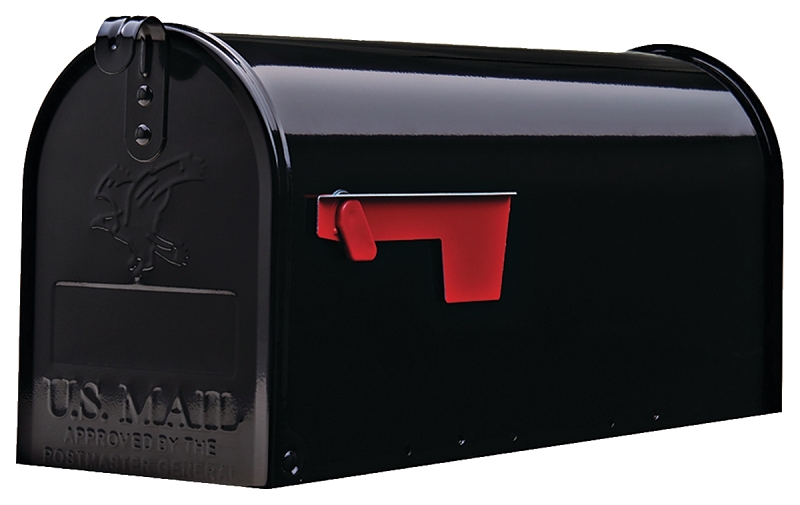
Gibraltar Elite Series
Black Galvanized Steel Post Mount Mailbox
800 cu. in. capacity. 6.9” wide x 20.5” high x 20.1” deep. Other colors and styles available per store location. (#6783542)
- Choose Your Installation Method
Depending on your preference and tools available, you can install your mailbox post using one of two methods:
No-Dig Method
Use a mailbox post spike that drives into the ground for a quick and easy installation—no digging required.
Dig-In Method
Dig a hole and set your post using expanding foam or fast-setting concrete for a more traditional, sturdy installation.
Both methods are effective—choose the one that works best for your yard and comfort level!
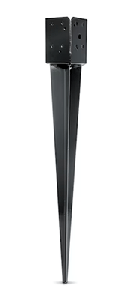
E-Z 4”x4” Post Up Spike
Used to install a standard treated mailbox post without digging holes or pouring concrete. (#FPBS44)
Watch Installation Video

Sika PostFix
Expanding Foam Post Mix
33 oz. Easy to prepare. Mix-in-the-bag and pour! Fast setting, expanding polyurethane foam for mailbox posts. (#1019686)
Watch Installation Video
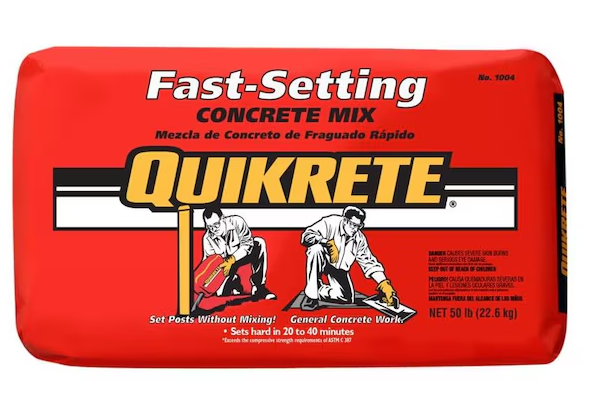
Quikrete
Fast Set Concrete Mix
50 lb. Special blend of fast-setting ce-ments, sand and gravel designed to set hard in approx. 20 to 40 minutes. Sets posts without mixing. Pour dry mix into hole and soak with water. (#MASFA)
Watch Installation Video
- Gather Materials
Ensure you have all necessary tools and materials, including a shovel, level, tape measure, and the chosen mailbox and post. - Dig the Hole (if using expanding foam or concrete dig method)
Dig a hole approximately 2 feet deep to ensure stability. - Set the Post
Place the post in the hole, ensuring it’s level. Use fast-setting concrete or expanding foam post mix to secure it in place. - Attach the Mailbox
Once the post is secure, attach the mailbox according to the manufacturer’s instructions. - Add Finishing Touches
Ensure the mailbox door opens freely and that address numbers are clearly visible.
MAILBOX MAINTENANCE TIPS
Regular maintenance ensures your mailbox remains functional and enhances your home’s curb appeal. Here are some tips:
Cleaning: Regularly clean your mailbox to remove dirt, bird droppings, and debris. Use mild detergent and water to prevent rust and deterioration.
Lubrication: Periodically lubricate moving parts, such as hinges and locks, to ensure smooth operation.
Inspection: Check for any signs of damage, rust, or wear. Addressing minor issues promptly can prevent more significant problems later.
Visibility: Ensure your mailbox’s address numbers are visible and unobstructed by vegetation. This aids mail carriers and emergency responders in locating your home.
SHOP MAILBOX REPAIR ESSENTIALS AT CURTIS LUMBER!
Visit your nearest Curtis Lumber store to find these products and more. Our expert staff is ready to help you choose the best materials for your mailbox project!